

Pankil is a Civil Engineer turned freelance writer. Since his arrival at Guiding Tech in 2021, he delves into the world of how-tos, and troubleshooting guides for Android, iOS, and Windows. Besides his new-found love for mechanical keyboards, he's a disciplined footfall fan and loves international travel with his wife. Learn about our Tech Review Board
Updated August 9, 2024 Reviewed & Updated by Paurush Chaudhary Expertise: Technology, Content Writing, YouTube, Cinema, Desserts Education: PDGM in English JournalismPaurush dabbles around iOS and Mac while his close encounters are with Android and Windows. Before becoming a writer, he produced videos for brands like Mr. Phone and Digit. On weekends, he is a full-time cinephile trying to reduce his never-ending watchlist, often making it longer. Learn about our Tech Review Board
Is Google Messages failing to download MMS messages automatically? That could happen if you’ve mistakenly disabled the auto-download MMS feature. Here’s how you can enable it.
Open the Messages app > Profile icon > Settings > Advanced > Enable Auto-download MMS.
Google Messages may have trouble downloading MMS messages if you’ve imposed background data restrictions on the app. Here’s how to change that.
Open Messages app info > Mobile Data > Allow background data usage.


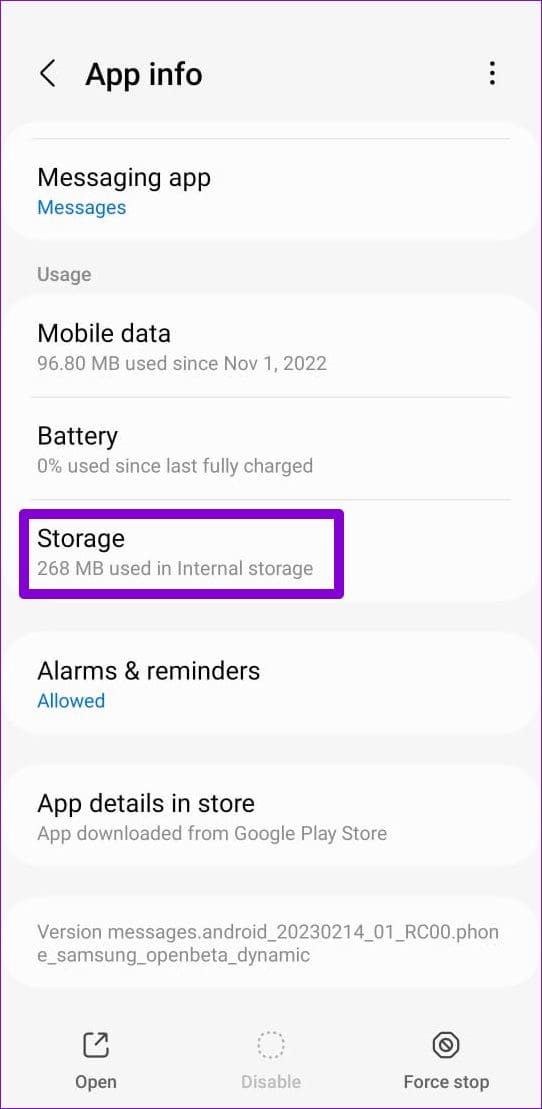
Google Messages saves cache files to improve app performance on Android. However, these cache files can occasionally become problematic, causing some app features to stop working. Thankfully, Android makes it relatively simple to delete the redundant app cache.
Open Messages app info > Storage > Clear cache.

Misconfigured APN (Access Point Name) settings can also prevent apps from connecting to the internet and cause such problems. A quick way to fix incorrect APN settings on Android is to reset them. Here are the steps for the same.
Step 1: Open Settings > Connections > Mobile Networks.
Step 2: Tap on Access Point Names.
Step 3: Tap the three vertical dots menu icon at the top right corner and then select Reset to default.


Step 4: Select Reset to confirm.
If none of the solutions have worked, we suggest to reset the network settings on your Android phone.