Sidebar
I am Shaun, a driven consultant excited about all things Microsoft. I have spend a number of years helping customers migrate their environments to Microsoft 365 as well as Microsoft Azure. The technology I focused on the most was Microsoft Exchange and over the years I started moving more towards Microsoft's cloud technologies. In my blog you will find topics around Azure, Exchange, Teams, Intune and a few PowerShell here and there :) . I am a major Lego Fan boy and every now and then I do show some of the builds on my socials.
Categories
- Active Directory (55)
- ADFS (2)
- ADSI Edit (2)
- AntiVirus (2)
- ATP (4)
- Audit Log Search (2)
- AWS (1)
- Azure (63)
- Azure Active Directory (20)
- Azure Active Directory Domain Services (2)
- Azure AD Connect (6)
- Azure AD Identity Protection (3)
- Azure ARC (2)
- Azure Firewall (1)
- Azure Policy (2)
- Azure Storage (2)
- Azure VM (10)
- Cisco (1)
- Cloud (14)
- Cloud PC (1)
- Cloud Posture Management (2)
- Command Prompt (8)
- Command Prompted (1)
- Conditional Access (10)
- Database (1)
- DELL Quest Tools (1)
- Delve (2)
- DHCP (1)
- DNS (1)
- Domains (6)
- DUO MFA (1)
- Entra ID (14)
- Exchange 2010 (39)
- Exchange 2013 (31)
- Exchange 2016 (46)
- Exchange Online (55)
- Exchange Online Protection (8)
- Exchange Server (76)
- Featured (1)
- Free Tools (4)
- Google CloudPlatform (1)
- Group Policy (1)
- Group Policy (4)
- Groups (7)
- Hyper-V (2)
- Intune (2)
- KEMP (1)
- KeyVault (2)
- KQL (1)
- Linux (1)
- MAC (3)
- Microsoft 365 (36)
- Microsoft 365 Archive (1)
- Microsoft 365 Backup (1)
- Microsoft 365 Compliance (1)
- Microsoft 365 Copilot (1)
- Microsoft 365 Defender (8)
- Microsoft Azure (3)
- Microsoft Compliance Configuration Analyzer (1)
- Microsoft Defender for Cloud (10)
- Microsoft Defender for Cloud Apps (3)
- Microsoft Defender for Endpoint (8)
- Microsoft Defender for Threat Intelligence (4)
- Microsoft Defender XDR (2)
- Microsoft Entra (18)
- Microsoft Entra Cloud Sync (1)
- Microsoft Entra Connect (1)
- Microsoft Entra Permissions Management (1)
- Microsoft Intune (3)
- Microsoft Office (2)
- Microsoft Teams (1)
- Office 2016 (3)
- Office 365 (117)
- OneDrive (3)
- OneDrive (2)
- Outlook (3)
- PowerShell (145)
- Queue Database (1)
- Remote Mailbox (2)
- RoomMailbox (1)
- Safe Links (2)
- Security (17)
- Service Endpoint (1)
- Shared Mailbox (1)
- SharePoint (3)
- SharePoint Online (4)
- Skype For Business (4)
- Storage (2)
- Teams (23)
- ThatLazyAdmin Blog (21)
- Ubuntu (1)
- Uncategorized (31)
- Veeam (2)
- Vmware (2)
- Web Application Proxy (1)
- Windows (61)
- Windows 365 (1)
- Windows Nano Server (2)
- Windows Server 2008 (27)
- Windows Server 2012 (56)
- Windows Server 2016 (25)
- Windows XP (1)
How to Configure ADFS Web Application Proxy for ADSF
Published by lazy-admin on Apr 17, 2018
How to Configure ADFS Web Application Proxy for ADFS
This post will cover the steps needed to configure the ADFS Web Application proxy.
What is an ADFS Web Application Proxy?
WAP provides reverse proxy functionality for web applications in the corporate network which allows users on most devices to access internal web applications from external networks.
The WAP should not be part of the domain and should be used as an standalone server.
To start the configuration, the SSL certificate used on the ADFS server needs to be installed on the WAP Server.
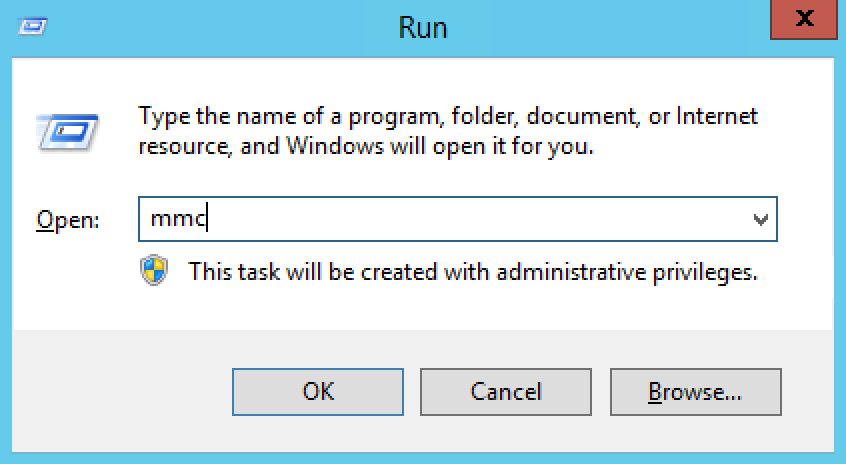
Open run, then type mmc
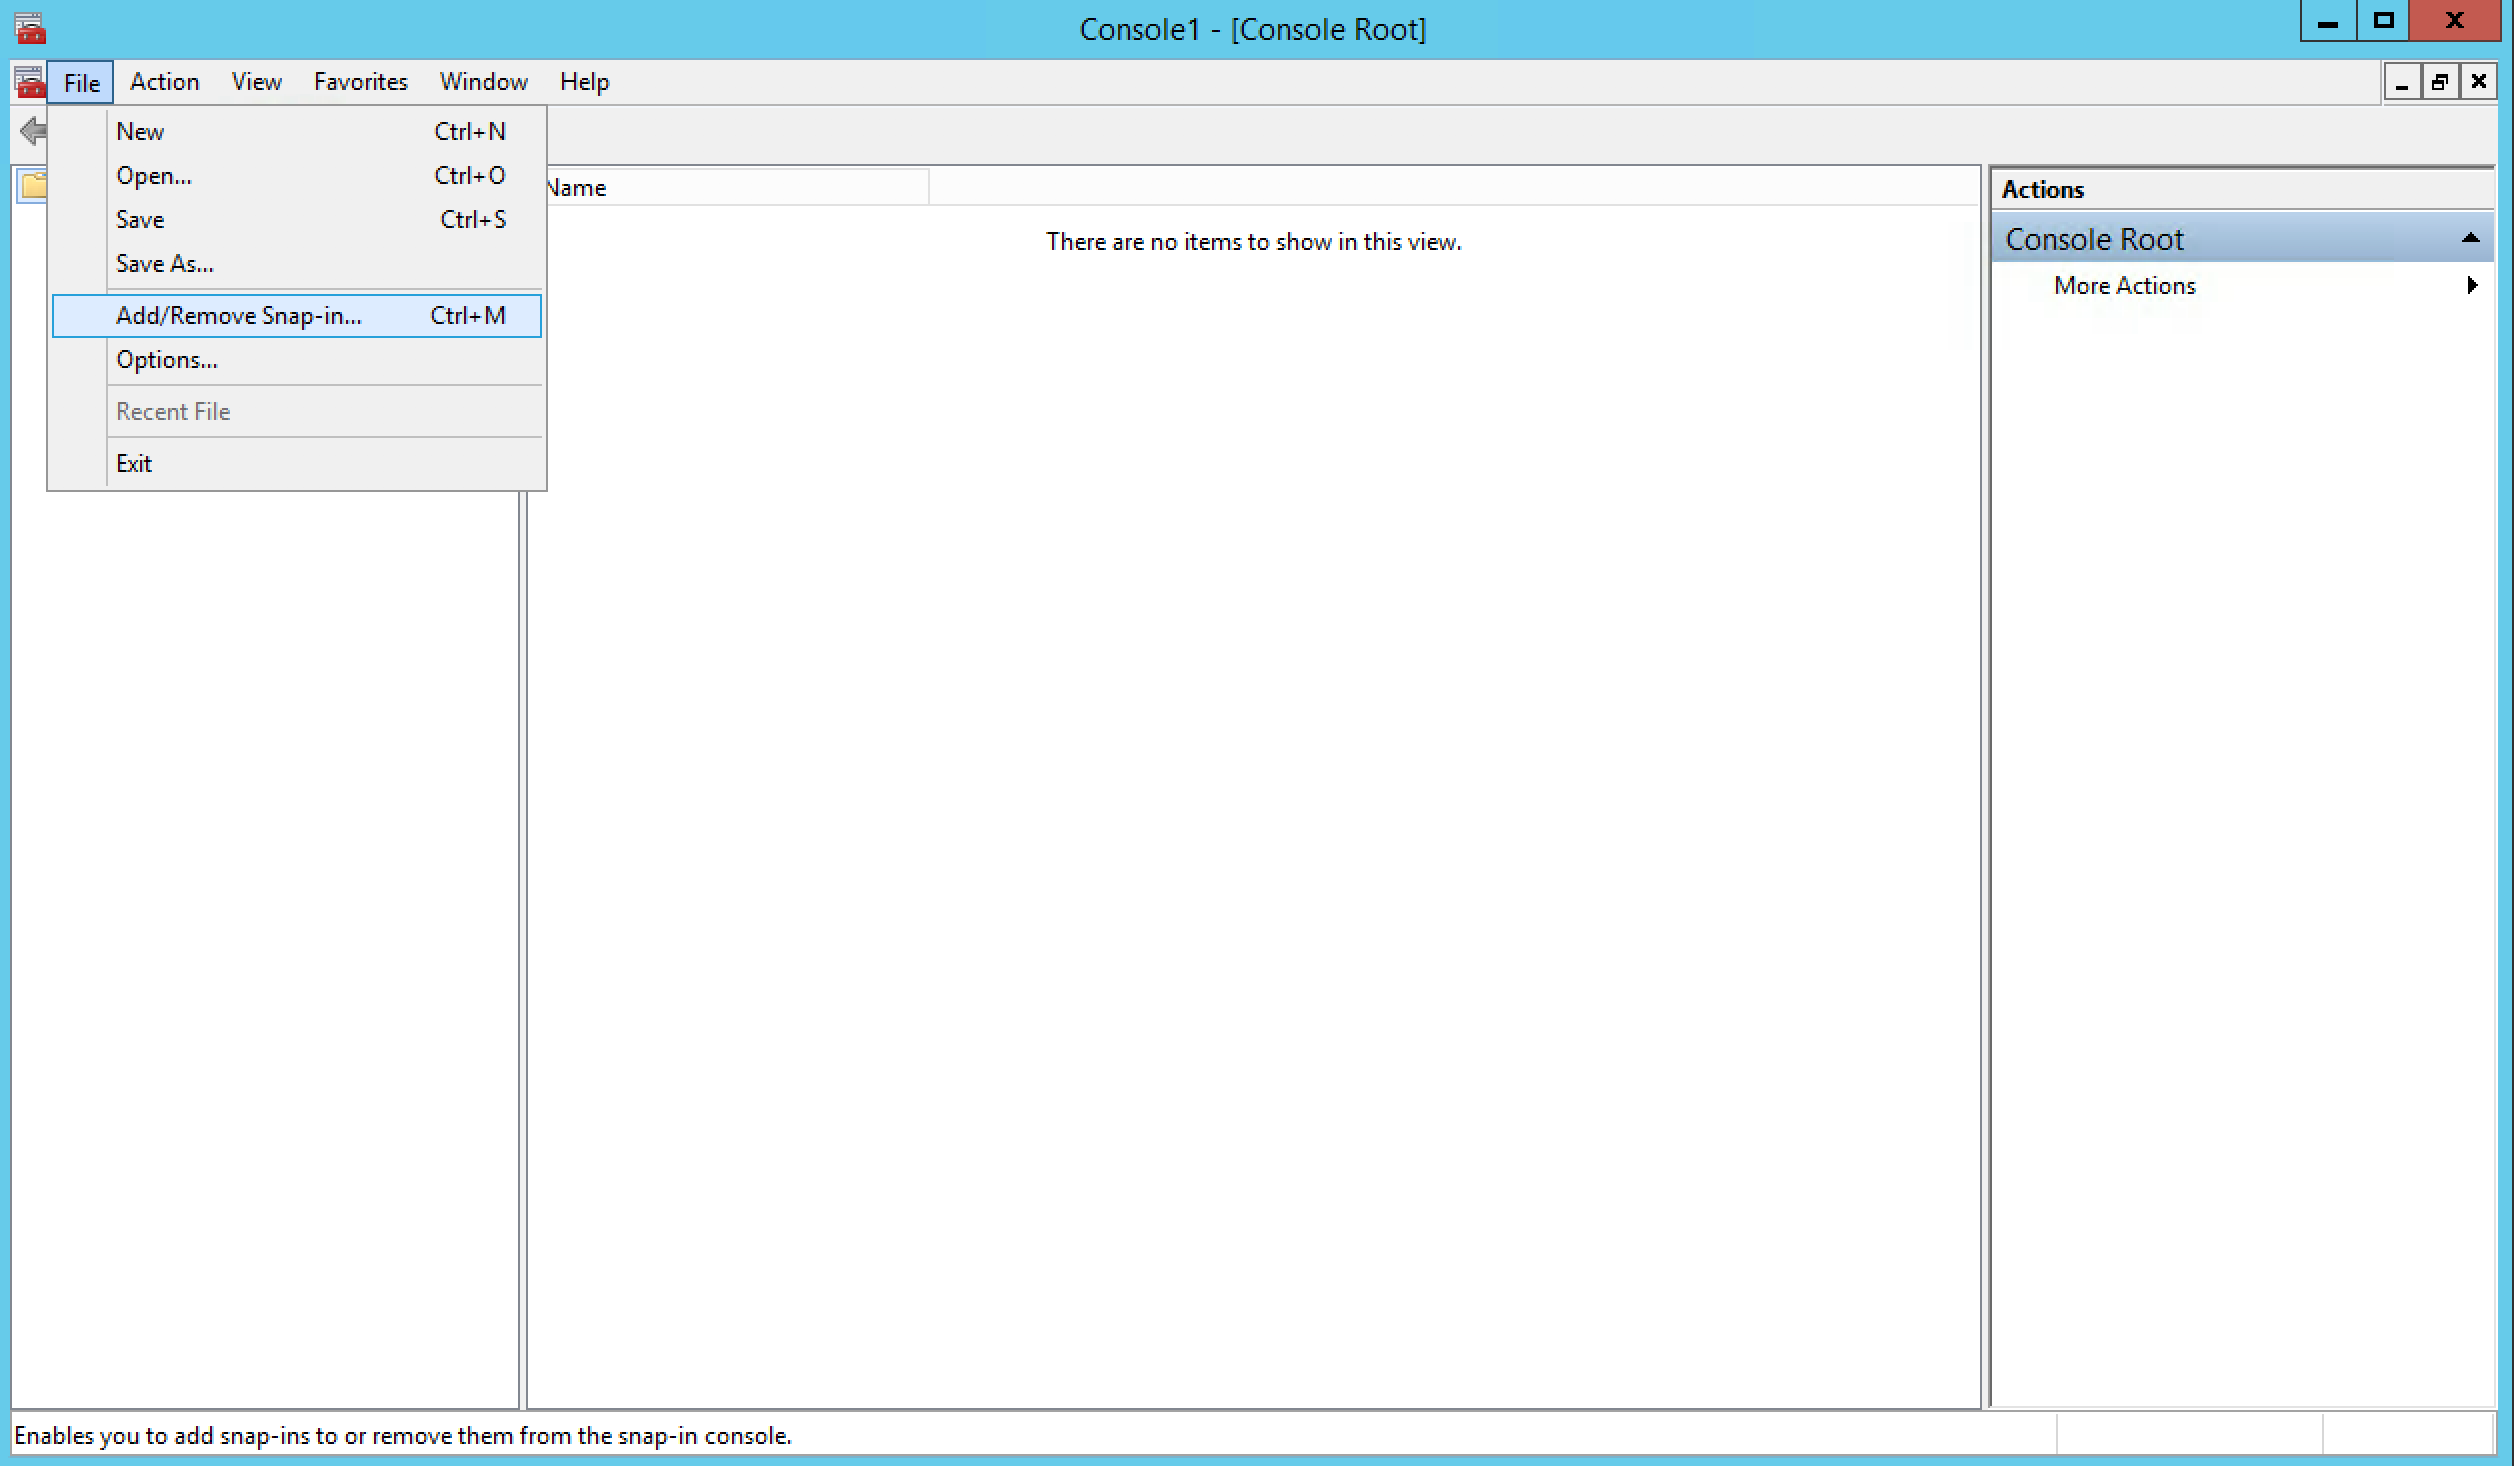
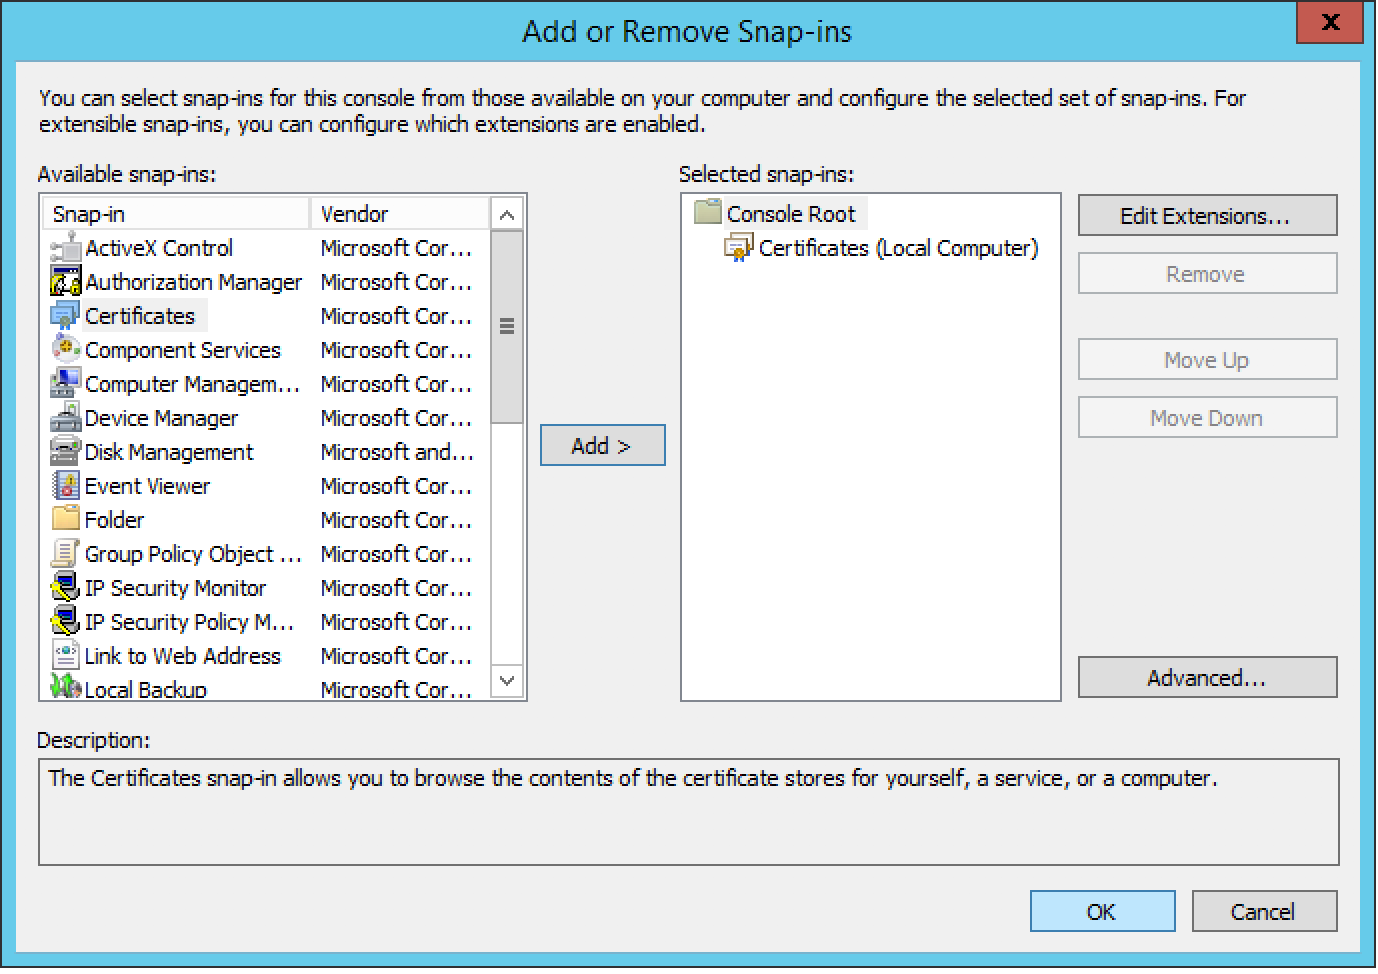
Once the mmc console is open , click on File >> Add /Remove Snap-In
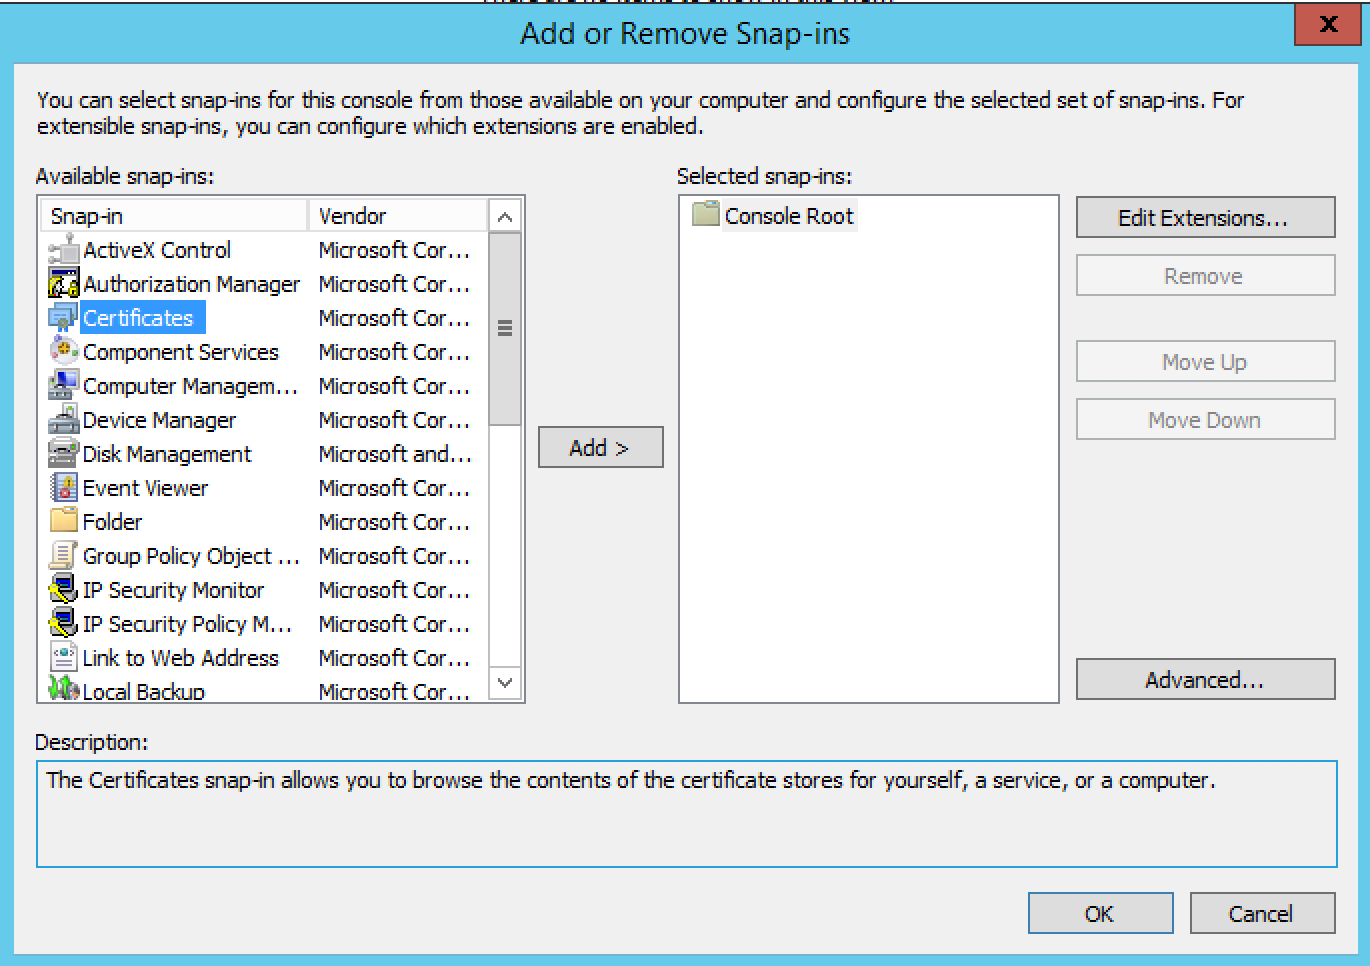
Select Certificates from the list and then click on Add.
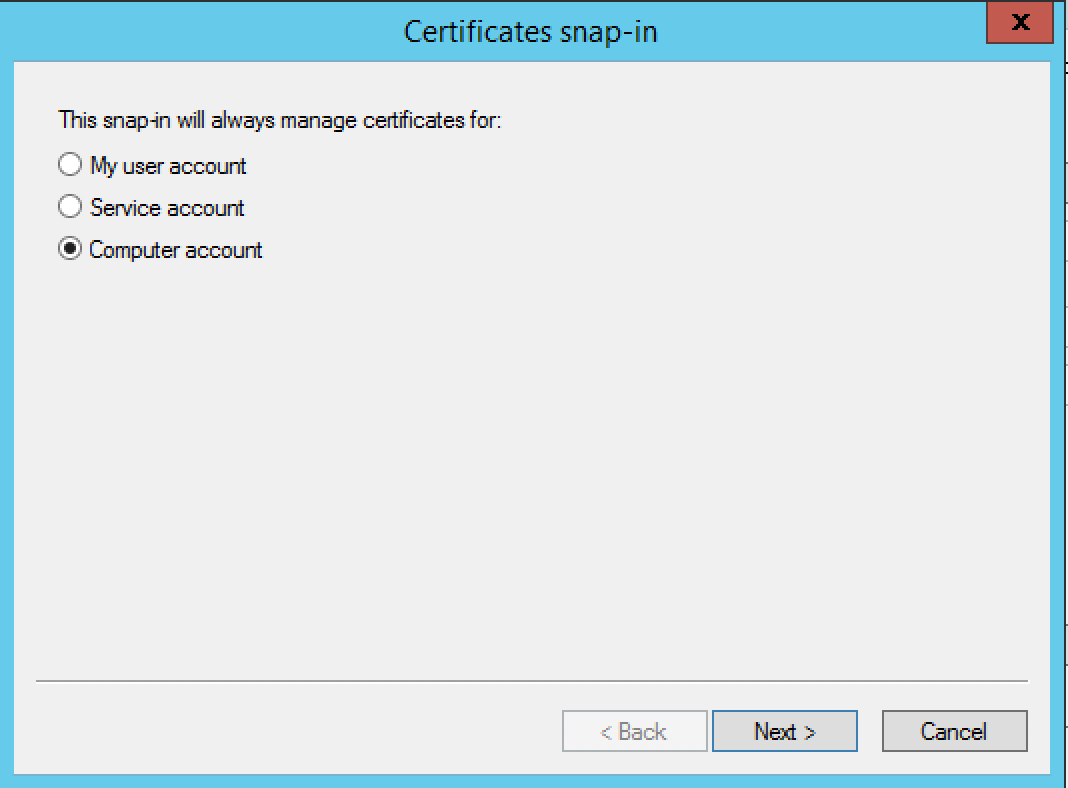
Select Computer account from the list, then click Next
Select Local computer, then click Next

To close the Snap-in , Click on Ok
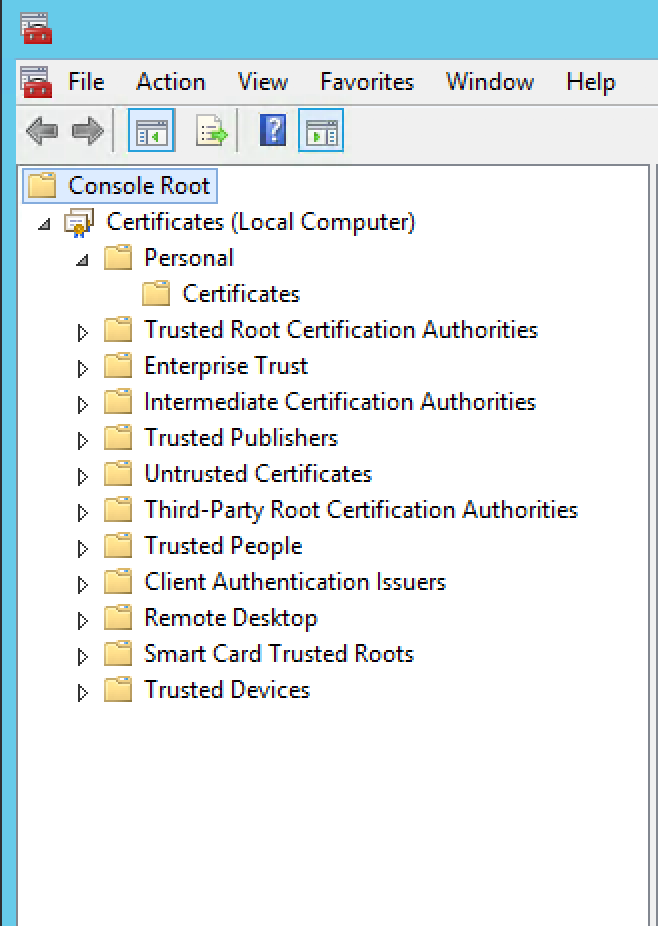
Expand Certificate, then expand Personal and click on Certificates.
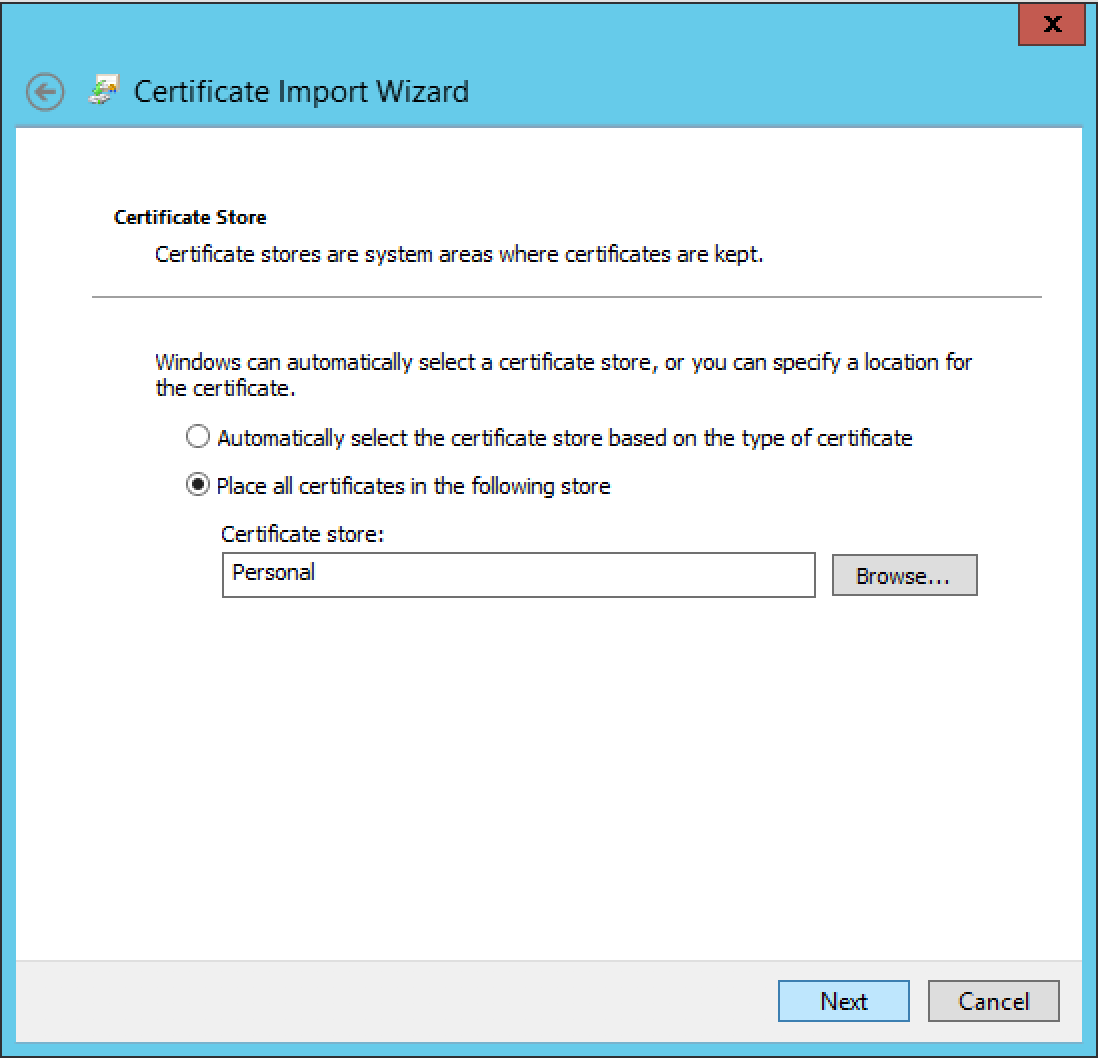
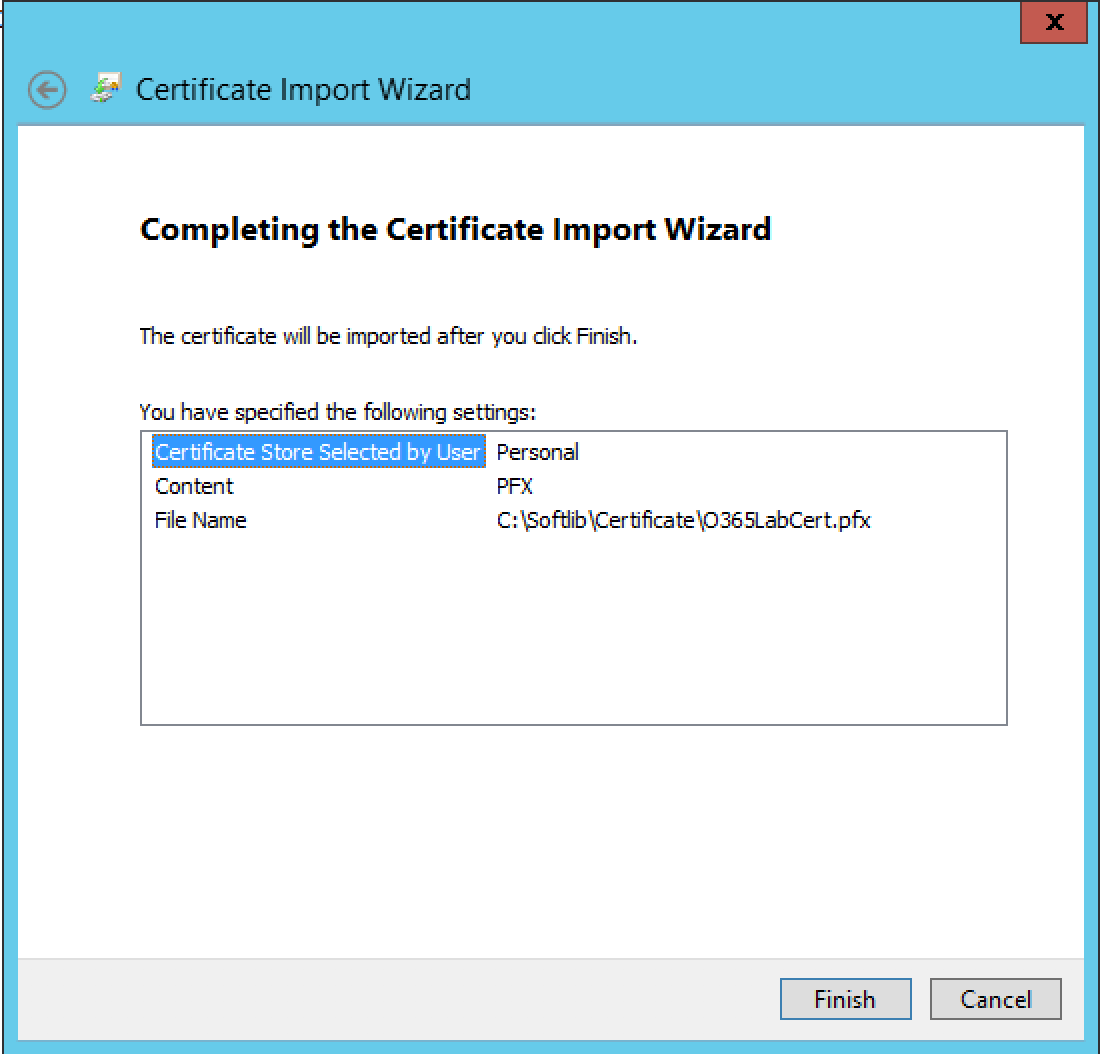
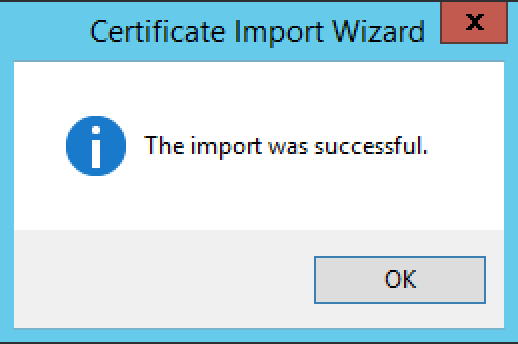
Right Click on Personal Certificates, then All Tasks and click on Import.
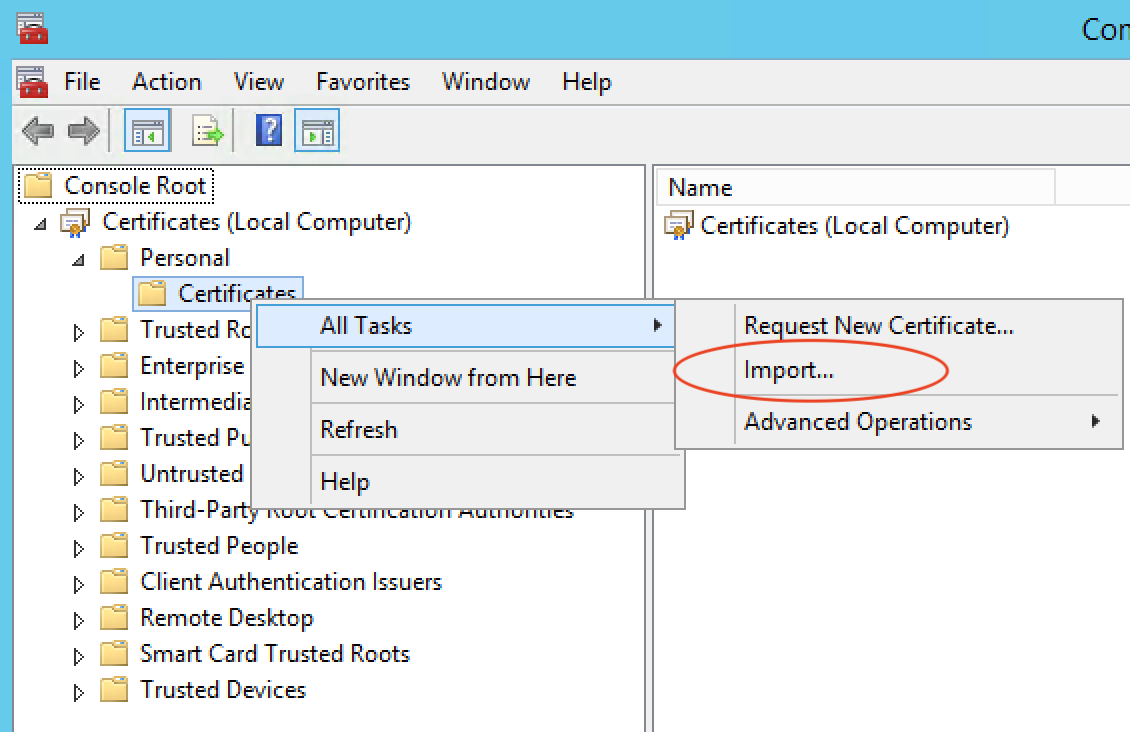
Follow the Import Wizard, then complete the Certificate import process.


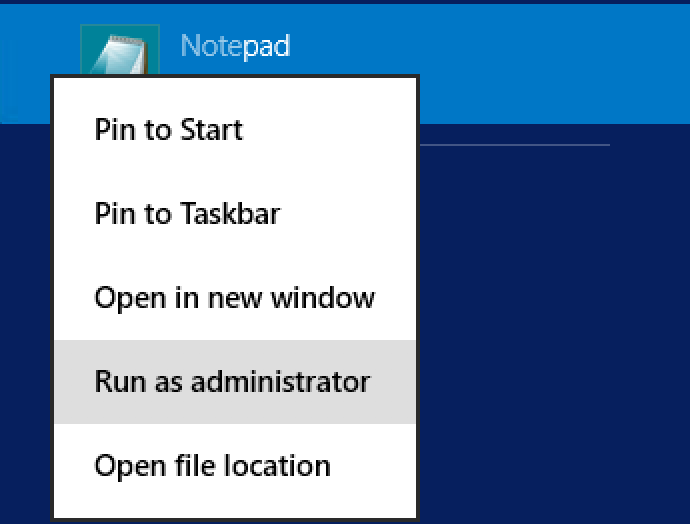
The next step is to edit the Host File and add and entry for the ADFS server. To open the Host file, Run Notepad as Administrator.
Location: C:\Windows\System32\drives\etc
Then navigate to the Host File location.
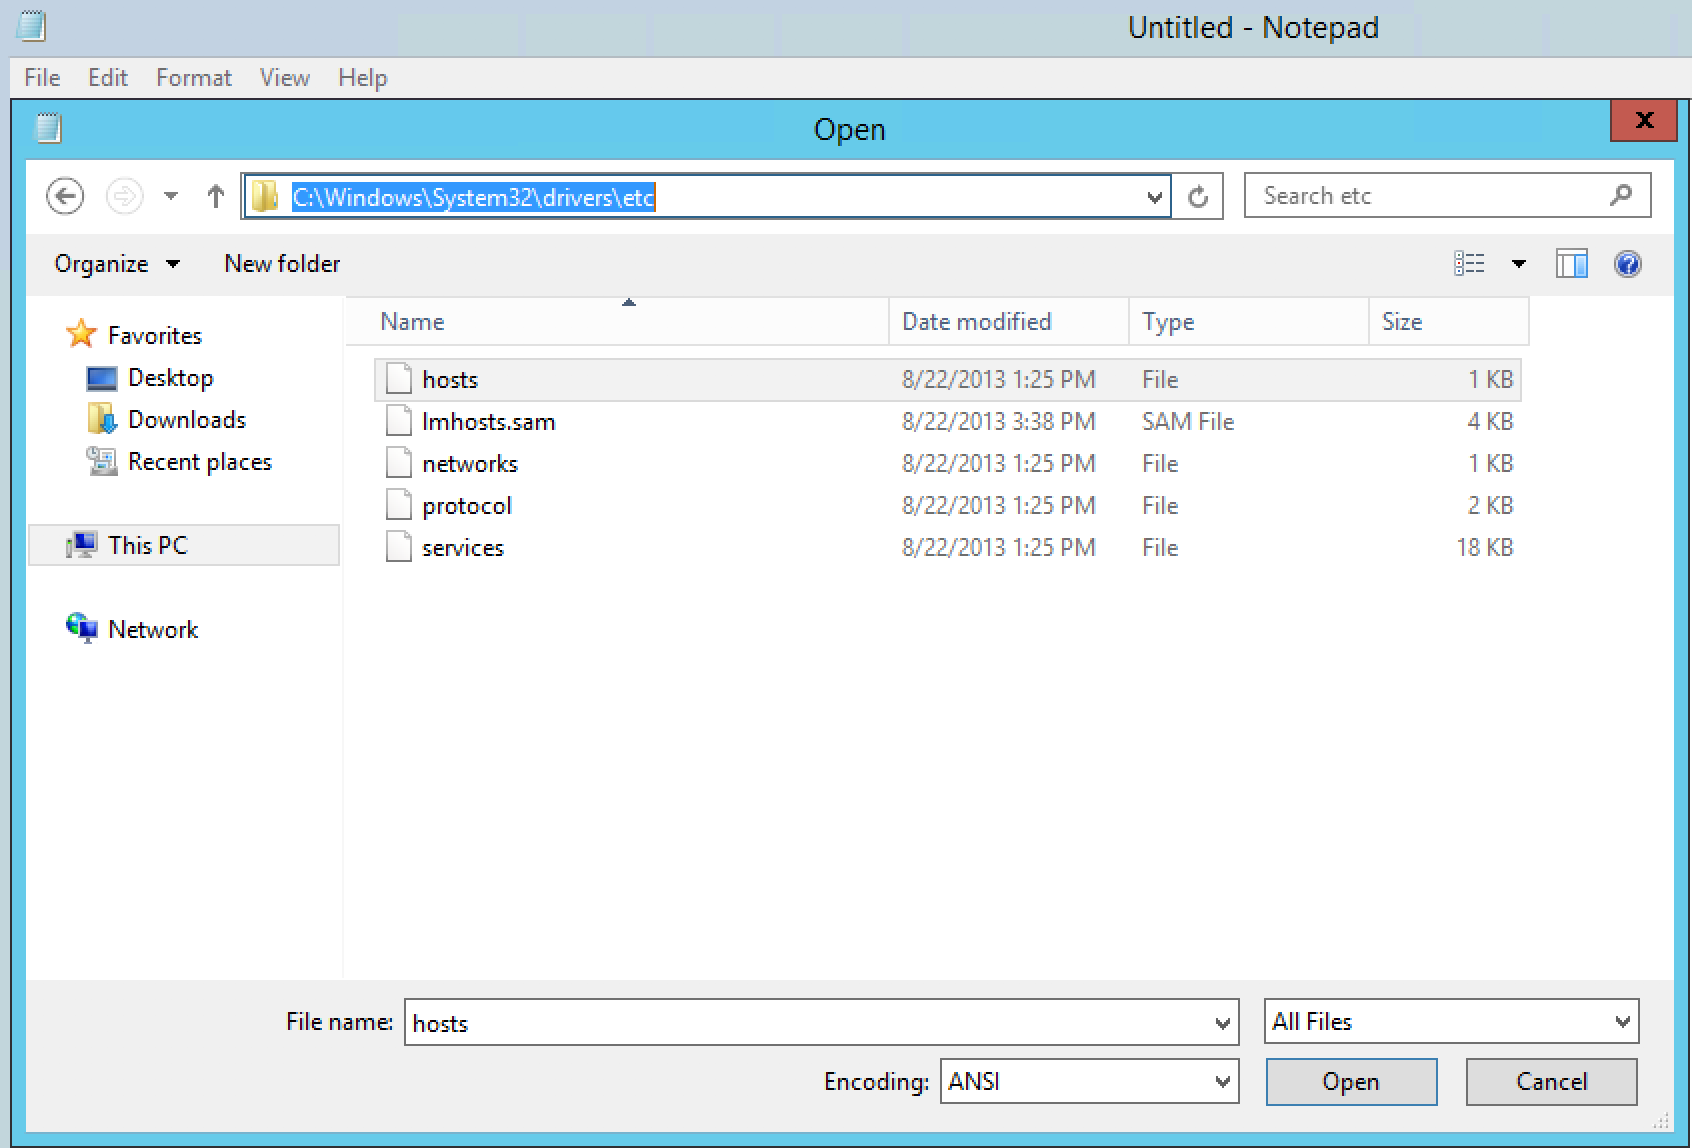
Modify the Host File, by adding the entry for the ADFS server with the associated IP.
Example: 10.2.0.14 fs.o365cloudlab.co.za

Click on File and then Save , to save the changes.

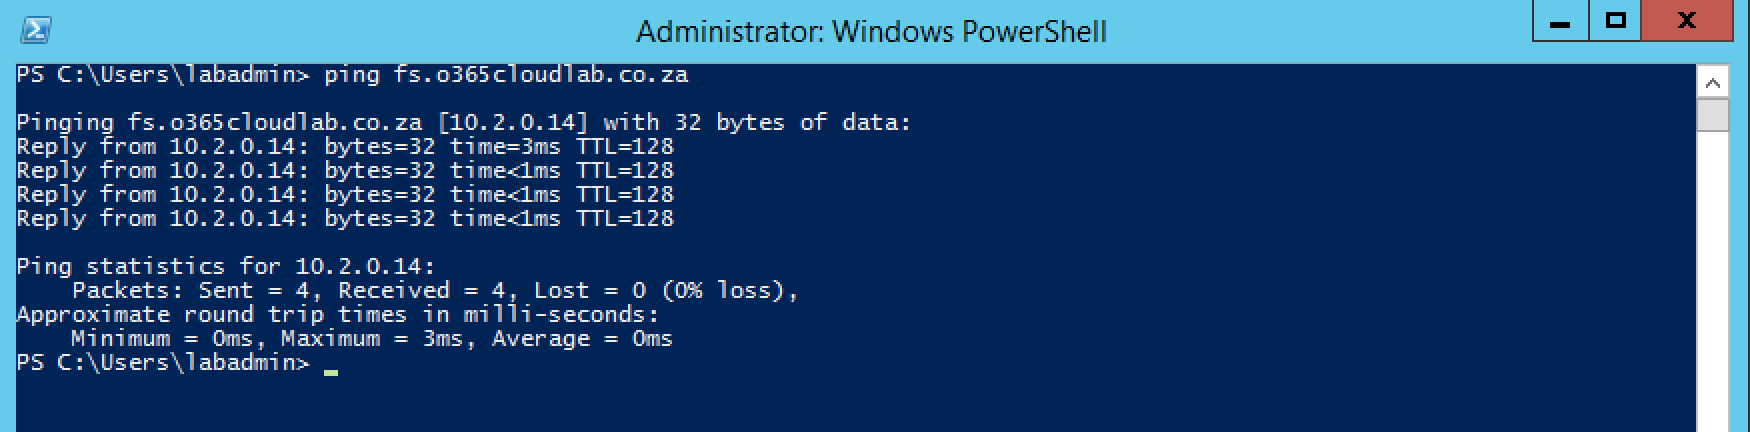
Lastly, lets ping the new entry from the WAP server, you should receive a response.
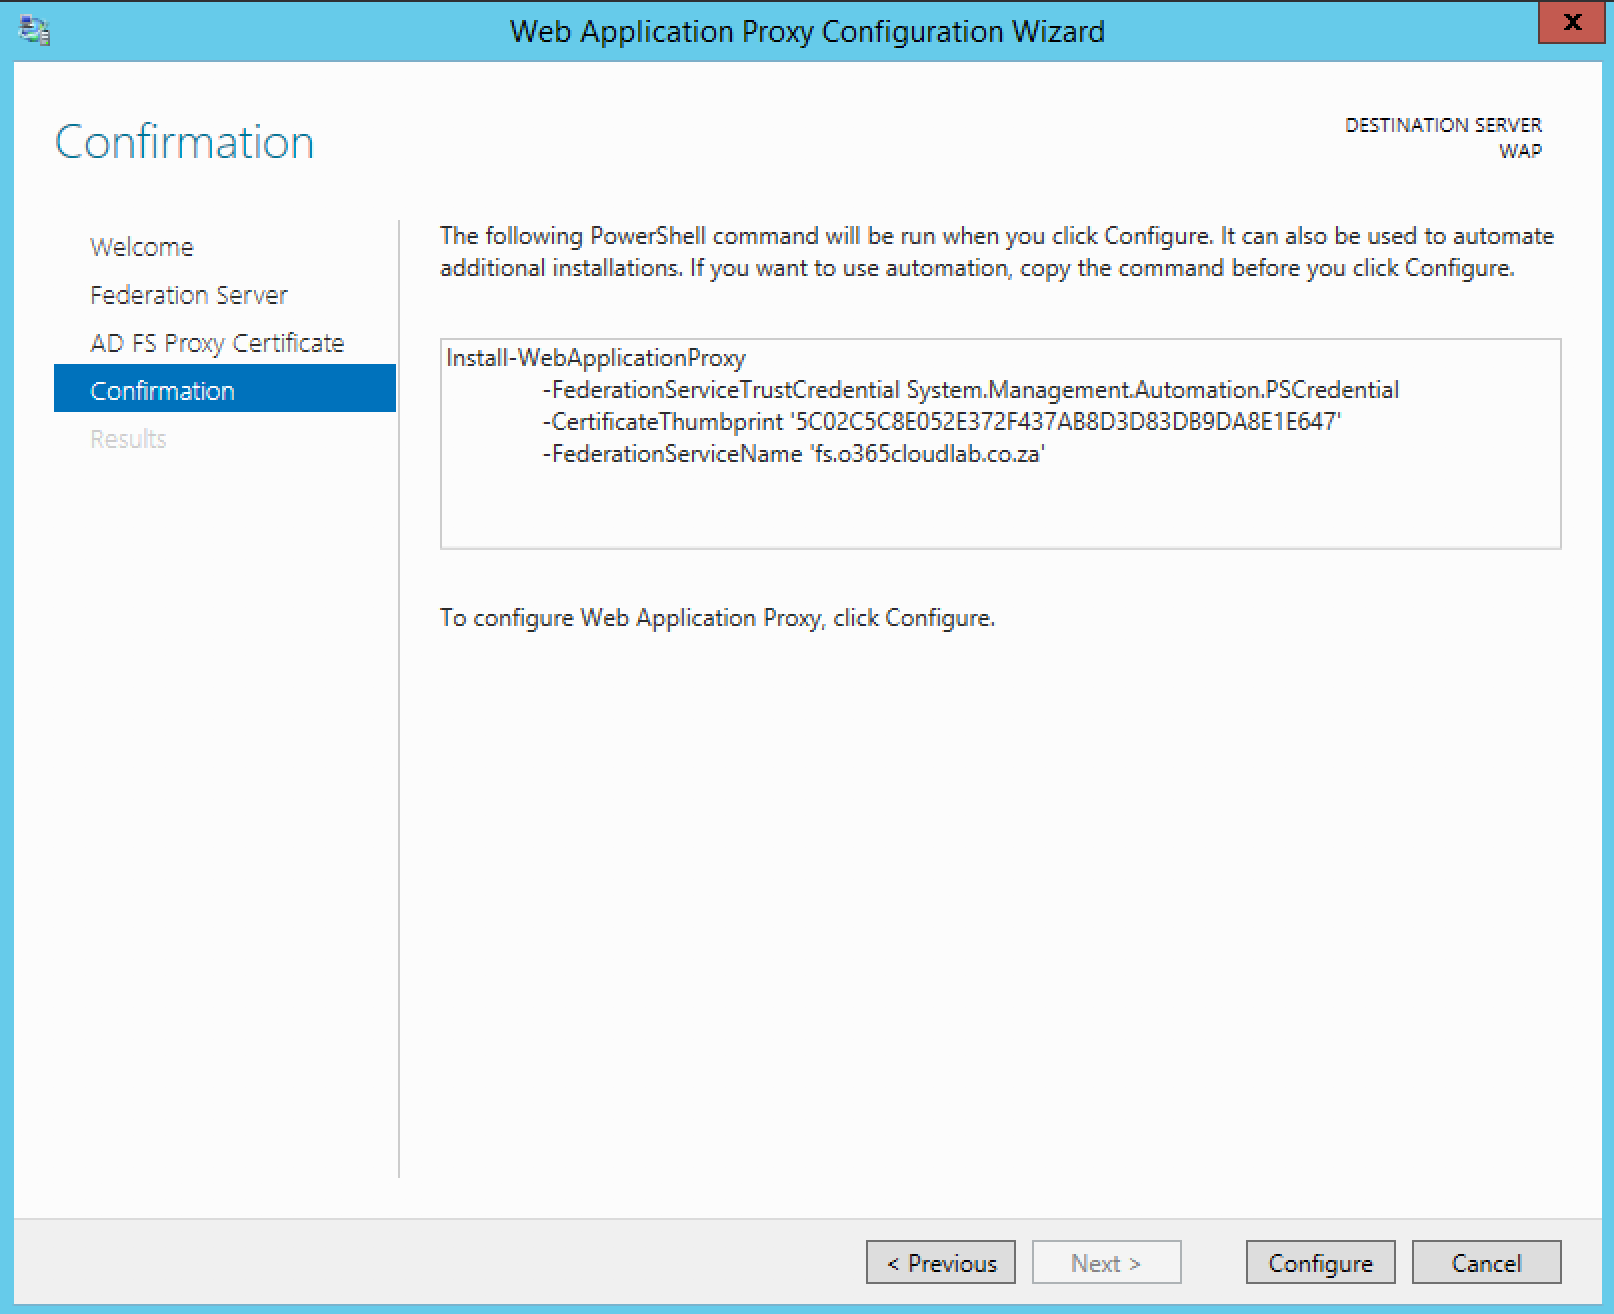
From a PowerShell session, run the following to start the installation process of the Web Application Proxy role.
